はじめに
蛍光画像などでは8bitグレースケールを扱うことがあります。
Image-Jなど画像処理ソフトウェアを使っても良いですが、仕組みを知っていると効率も上がるので学習してみました。
そのひとつとしてC#とLibTiff.Netを使って8bitグレースケールsingle TIFFを作成する方法を紹介します。
WindowsのVisual C#でコンパイルして動かしました。
実行ファイルはLinuxでも動作します。
環境
WindowsではMicrosoftからVisual C#をダウンロード、プロジェクトを作成して実行ファイルを作成します。

Windows、Mac、Linux 用の Visual Studio と VS Code のダウンロード
Visual Studio IDE または VS Code を無料でダウンロードします。 Windows、Mac で Visual Studio Professional または Enterprise...
LibTiff.Net
libtiffのC#版でWindowsとLinuxで使います。
Read and write TIFF images in C# and VB.NET | LibTiff.Net
LibTiff.Net is a .NET version of libtiff library for reading and writing TIFF images.
コンパイル(環境1)
「スタート」→「Microsoft Visual Studio 2019」→「Visual Studio コマンドプロンプト(2019)」を使います。
ソース名がhoge.cs、実行ファイル名をout.exeとするとき、以下のようにコンパイルします。
csc /lib:.\ /reference:BitMiracle.LibTiff.NET.dll /out:out.exe hoge.cs

ファイルが複数ある場合

csc /lib:.\ /reference:BitMiracle.LibTiff.NET.dll /out:out.exe hoge1.cs hoge2.cs
コンパイル(環境2)
ソースの改行コードはLFにしてください。
mcs -r:./BitMiracle.LibTiff.NET.dll -out:out.exe hoge.cs
又は、
dmcs -r:./BitMiracle.LibTiff.NET.dll -out:out.exe hoge.cs

ファイルが複数ある場合
mcs -r:./BitMiracle.LibTiff.NET.dll -out:out.exe hoge1.cs hoge2.cs
又は、
dmcs -r:./BitMiracle.LibTiff.NET.dll -out:out.exe hoge1.cs hoge2.cs

実行は以下。
chmod 755 ./out.exe
./out.exe
ソース
非圧縮のTIFF画像を生成します。
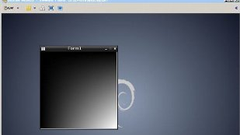
作成した画像は画像処理ソフトウェアか、この記事のプログラムで表示できます。
また、ソースにある「System.Diagnostics.Process.Start(fileName);」のコメントを外すと表示できます。
//#define TIFF_WRITE_ALL // データをまとめて書き込む

using System;
using System.Diagnostics;
using BitMiracle.LibTiff.Classic;

//namespace LibTiffSamples
//{
public static class Create8BitTiff
{
    // main
    static void Main(string[] args)
    {
        Console.WriteLine("Create 8bit Tiff file.");
        createTiff();
    }

    // TIFF create
    private static void createTiff()
    {
        int    i, j, width, height;
        ushort samplesperpixel, bitspersample;
        double resolution;
        string fileName = "8bit.tif";

        width           = 512;
        height          = 256;
        resolution      = 72.0;
        bitspersample   = 8;
        samplesperpixel = 1;

        using (Tiff output = Tiff.Open(fileName, "w"))
        {
            if (output == null)
            {
                Console.WriteLine("Can not create Tiff file.");
                return;
            }

            // 画像データのメモリ確保
            byte[] image = new byte[width * height];

            // 画像データ作成
            for( i = 0; i < height; i++ )
            {
                for( j = 0; j < width; j++ )
                {
                    image[width * i + j] = ( byte )( (i * j) / byte.MaxValue );
                }
            }

            output.SetField(TiffTag.IMAGEWIDTH, width);
            output.SetField(TiffTag.IMAGELENGTH, height);
            output.SetField(TiffTag.SAMPLESPERPIXEL, samplesperpixel);
            output.SetField(TiffTag.BITSPERSAMPLE, bitspersample);
            output.SetField(TiffTag.ORIENTATION, Orientation.TOPLEFT);
            // output.SetField(TiffTag.ROWSPERSTRIP, height);
            output.SetField(TiffTag.XRESOLUTION, resolution);
            output.SetField(TiffTag.YRESOLUTION, resolution);
            output.SetField(TiffTag.RESOLUTIONUNIT, ResUnit.INCH);
            output.SetField(TiffTag.PLANARCONFIG, PlanarConfig.CONTIG);
            output.SetField(TiffTag.PHOTOMETRIC, Photometric.MINISBLACK);
            output.SetField(TiffTag.COMPRESSION, Compression.NONE);
            output.SetField(TiffTag.FILLORDER, FillOrder.MSB2LSB);

#if TIFF_WRITE_ALL
            // まとめて書き込み
            byte[] buf = new byte[image.Length * sizeof(byte)];
            Buffer.BlockCopy(image, 0, buf, 0, buf.Length);
            output.WriteEncodedStrip(0, buf, buf.Length);
            Console.WriteLine("batch output.");
#else
            // 1行ずつ書き込む
            for (i = 0; i < height; i++)
            {
                byte[] line = new byte[width];
                for (j = 0; j < width; j++)
                {
                    line[j] = image[width * i + j];
                }
                byte[] buf = new byte[line.Length * sizeof(byte)];
                Buffer.BlockCopy(line, 0, buf, 0, buf.Length);
                output.WriteScanline(buf, i);
            }
            Console.WriteLine("one line output.");
#endif
            output.WriteDirectory();
        }

        // 画像表示
        //System.Diagnostics.Process.Start(fileName);
    }
} // end of Create8BitTiff class
//} // end of namespace


Comments